Understanding Vapor Barrier Installation
What is a Vapor Barrier?
A vapor barrier is a material designed to impede the passage of moisture through walls, ceilings, and floors in a building. It serves as a protective layer in crawl spaces, basements, and other areas where moisture can accumulate. Typically made from polyethylene plastic sheeting, vapor barriers are critical in combatting humidity and controlling condensation, which can lead to mold and water damage.
Importance of Vapor Barrier Installation
Proper Vapor Barrier Installation is crucial for maintaining the integrity of your home. Excess moisture from the ground can infiltrate through the foundation, leading to mold growth, wood rot, and compromised structural integrity. Moreover, a well-installed vapor barrier improves indoor air quality by reducing the humidity levels, which not only enhances comfort but also protects health and safety.
Common Materials Used
Vapor barriers are commonly made from materials like polyethylene plastic, which comes in varying thicknesses. Other materials can include foil-faced insulation, which also reflects heat, thereby improving energy efficiency. The choice of material often depends on local building codes, climate considerations, and specific project needs.
How to Prepare for Vapor Barrier Installation
Assessing Your Crawl Space
Before installation, it’s vital to assess the crawl space adequately. Look for signs of existing moisture damage or mold, check the overall drainage of the area, and note any gaps or cracks in the foundation walls. This assessment will help you determine if any preparatory work—like repairing leaks or improving drainage—is necessary before laying down the vapor barrier.
Gathering Essential Tools
Organizing the right tools is essential for a smooth installation process. You will need a utility knife for cutting the vapor barrier, measuring tape for accurate measurements, and possibly a stapler or adhesive for securing the material. Additionally, a moisture meter can help you gauge humidity levels within the crawl space, guiding your installation choices.
Understanding Local Building Codes
Before proceeding, it’s crucial to familiarize yourself with local building codes regarding vapor barriers. Different regions have specific regulations that dictate materials and installation methods, often based on humidity levels, climate, and the materials used in home construction. Consulting local codes ensures that your installation not only meets safety standards but is also effective in moisture control.
Step-by-Step Guide to Vapor Barrier Installation
Measuring and Cutting the Barrier
Begin by measuring your crawl space's dimensions to order the right amount of vapor barrier. Consider overlaps for seams as you lay the material. Cut the barrier carefully with a utility knife to fit the dimensions of your crawl space, allowing extra material at the edges for secure attachment.
Securing the Vapor Barrier Correctly
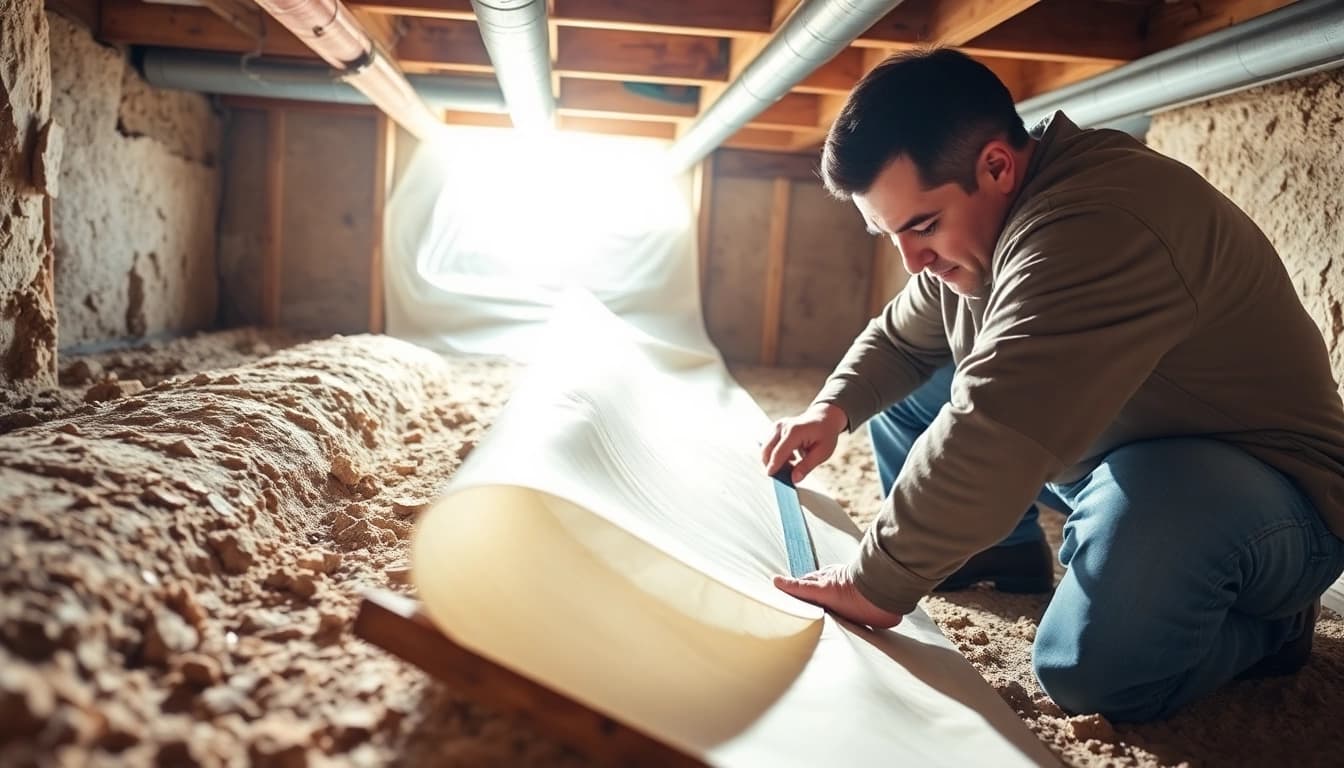
Once cut, it's vital to secure the vapor barrier to ensure maximum efficiency. Start from one end of the crawl space and unfurl the barrier, using stakes or adhesive to anchor it to the ground. Ensure that all edges are sealed tightly against walls, piers, and posts to prevent moisture ingress effectively.
Sealing and Insulating Your Crawl Space
After laying the vapor barrier, you should consider additional sealing. Use tape designed for vapor barriers to seal the seams meticulously. Insulating the walls of the crawl space can also help enhance energy efficiency, reducing heating and cooling costs. Proper sealing and insulation work in concert with the vapor barrier to create an effective moisture control system.
Common Mistakes to Avoid in Vapor Barrier Installation
Poor Installation Practices
One of the most common errors in vapor barrier installation is improper installation techniques. Failing to secure the barrier properly, neglecting to overlap seams, or misaligned edges can all reduce the effectiveness of the system and lead to moisture issues down the line.
Ignoring Moisture Issues
Another frequent mistake is ignoring existing moisture problems in the crawl space before installation. If there are leaks or signs of mold, addressing these problems first is imperative to ensure a successful vapor barrier installation.
Neglecting Maintenance Checks
Lastly, neglecting routine maintenance checks can lead to deteriorating conditions over time. After installing your vapor barrier, periodic inspections should be completed to ensure its continued effectiveness, checking for any signs of moisture accumulation or damage.
FAQs About Vapor Barrier Installation
What are the benefits of installing a vapor barrier?
Vapor barriers prevent moisture accumulation, reducing mold growth and structural damage. They also improve indoor air quality and enhance energy efficiency, resulting in lower heating and cooling costs.
How often should I check my vapor barrier?
It’s advisable to check your vapor barrier at least once a year. Regular inspections help identify potential moisture issues early, ensuring your home remains protected.
Can I install a vapor barrier myself?
Yes, installing a vapor barrier can often be a DIY project. However, ensure you follow all guidelines, local codes, and safety precautions for the best results.
What materials are recommended for vapor barrier installation?
Polyethylene plastic sheeting is the most commonly used material. However, foil-faced insulation can also serve dual purposes of vapor barrier and insulation in certain scenarios.
How does a vapor barrier affect indoor air quality?
A vapor barrier effectively reduces humidity levels in the home, which helps mitigate mold and allergens, significantly improving indoor air quality and overall comfort.